Tips for painting en plein air

Outdoor painting

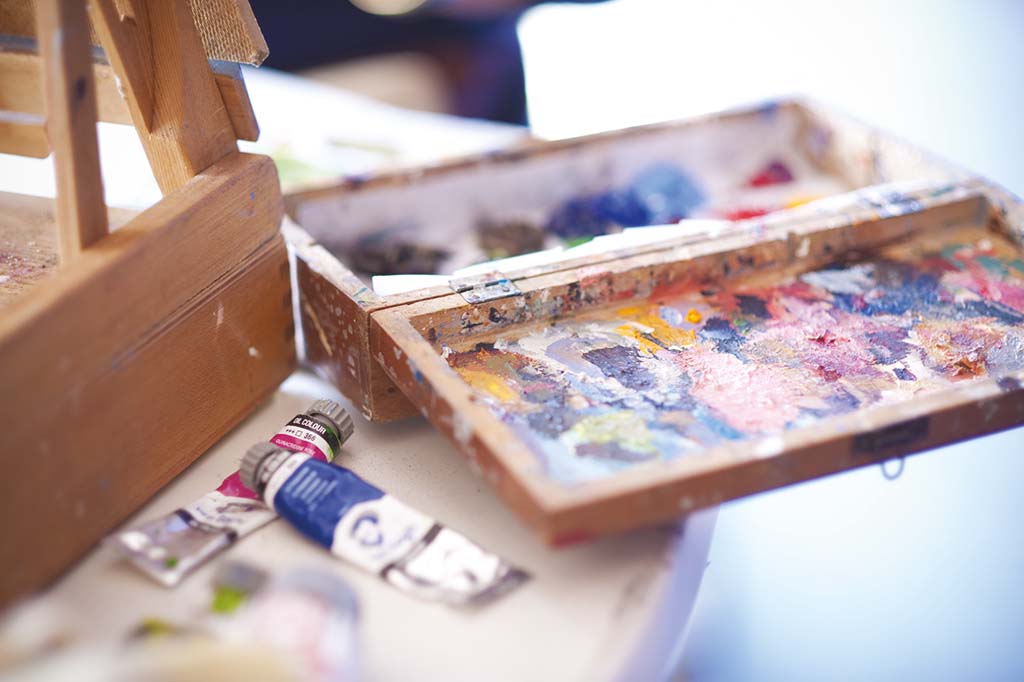
Anyone who has ever painted outdoors will tell you that there’s nothing quite like it. The fresh air, the beautiful light and colours—it’s all inspiring. But if you’re not a professional painter or artist, you may be wondering how to get started with outdoor painting. While there are plenty of tips out there for artists who paint on location, I’ve found that they don’t always work well for artists who are just getting started. So here are my top ten tips for painting en plein air:

Get an easel that works for you

It’s essential to find an easel that works for you.

Howth Head, Dublin Plein Air Painting Festival
  • Stable: You don’t want your painting knocked over by a gust of wind or someone walking by. A stable easel is also important so that you can paint quickly with confidence.
  • Portable: You may not always be able to carry a heavy piece of equipment with you, so look for something portable that’s easy on the back and shoulders!
  • Set-up time: Even if the easel has wheels or is foldable, it should still set up quickly and easily without any fussing around with parts or screws.
  • Adjustment options: The height should be adjustable so that artists can find their most comfortable standing position when painting outdoors in various settings like hillsides or sitting on beaches—not everyone is built alike!

Find a place to sit (or stand) while you paint

Plein Air Painting at Howth Head

If you’d prefer not to stand then it’s important to find a good place to sit while you paint. If you’re lucky, there will be plenty of benches or chairs available for visitors to use at the site.

First off: look for an elevated surface where there is no risk of sitting in any water or mud (if possible). Make sure it’s comfortable and stable enough not just for yourself, but also anyone else who might come along later.

Use the right canvas size

The size of your canvas is a major factor in how you’ll approach any given painting. A small canvas can limit your options, but it can also keep you from getting carried away with too much detail and colouration.

Keep you kit compact and light

  • Use a small backpack.
  • Use a small fold-up chair.
  • Use a small easel.
  • Use a small paint box, palette, and water container.
  • Use a small brush and/or paint knife to apply the paint and clean up any mistakes you make (as long as they’re not too big).

Protect yourself from the elements

Howth Head can be very windy!

The most important thing you can do to protect yourself from the elements is to wear a hat. Not only will it keep your head and face shaded, but it’ll also keep long hair (if you have any!) out of your eyes. You should also be sure to bring along sunscreen and sunglasses so that you don’t get sunburned or temporarily blinded by the sun as you paint.

Additionally, long sleeves and trousers help to prevent sunburn. Consider wearing trousers instead of shorts to avoid bug bites. Bring comfortable shoes with thick soles because en plein air paintings can take a few hours to complete. Bring along snacks for energy boosts—and water!

Conclusion

The most important thing to remember is that painting en plein air is fun. It’s a great excuse to get out of the studio and explore your surroundings, and it’s also a chance to be creative in new ways. Remember that you don’t have to be perfect, so long as you are enjoying yourself!

Using a Limited Palette for Painting

When learning how to paint, you’ll need to know how to choose a limited palette. This can help you master colour mixing and also keep your painting supply costs down.

What is a limited palette?

In traditional oil painting, a limited palette refers to the number of colours you decide to use in your painting. A limited palette is also often referred to as a monochromatic or tonal palette.

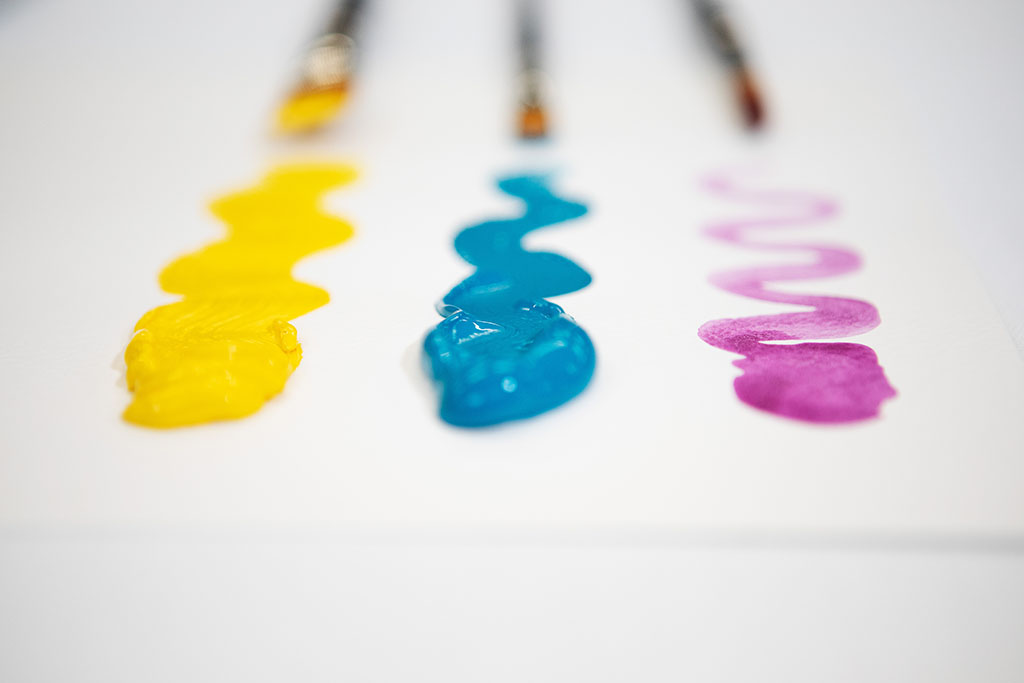
The most popular way to create a limited palette is with the three primary colours: red, blue and yellow. By mixing these three primary colours together you can create many variations.

Why limit the colours you use?

There are many reasons why you may want to limit the colours you use in your oil painting.

  • It helps you focus on your paintings. If you’re only using two or three colours, it’s easy to see when they don’t work together and make changes quickly without getting overwhelmed by all the options.
  • It helps develop your skills. If all the paintings you try are done with only two or three colours, it forces you out of your comfort zone and makes sure that every painting is a challenge for you. This way, not only will you improve at mixing paint but also at using colour in general—and this can be applied across different mediums too!
  • It develops style/creativity: You’ll learn how to create depth and mood through colour contrast as well as subtlety (since there’s less room for error). The result? A distinct signature style based on a limited palette

Portrait Painting

Portrait painters most often choose colours that are similar to skin tone, like red and yellow ochre. Artists can create different variations of these two shades by adding black or white paint to them (often referred to as a ‘Zorn palette’, which is named after Anders Zorn). This allows for subtlety in their portraits and helps create the illusion of skin tone without using an excessive amount of colour (which can make your painting look too busy).

Which colours should you choose?

When choosing colours for a limited palette, consider how it will help with colour mixing and how you will use the colours in your paintings.

  • A great way to choose a limited palette is to study the work of other artists whose work you admire, and see which colours they used. Google Arts and Culture has a treasure trove of paintings that can be studied.
  • If you don’t want bright or bolder tones, then opt for earthy tones instead. These can be mixed into lighter shades easily and are less chromatic and have weaker tinting strength compared to colours made from some of the modern synthetic pigments.

Conclusion

Now that you know a little bit more about how to choose colours for your own limited palette, it’s time to get started! Remember that this is a process of experimentation and discovery. If you make mistakes along the way, don’t be afraid to try again. And above all else: have fun with it!

Remy Raglan by Ginnie

Hello lovely, I’m Ginnie from @sewmebeautiful on Instagram. I “found” AnnMarie and Crafty Studio through Instagram and a mutual sewing friend. I won a gift voucher from AnnMaries shop in a giveaway they hosted together. It was the start of a wonderful series of fabrics crossing the pond!

I was kindly gifted 1,5 meters of this linen mix with stretch to make this blogpost. At first I planned making a pair of trousers, but I had a new top pattern that I wanted to try out first. It is the Remy raglan top from SewHouse7. It is intended for light weight linen and such, so the fabric is perfect for it. It comes in sizes 00-20 (bust 31”-47” – you really don’t need any other measurements as it’s quite boxy). What I like about this pattern is that it is super simple, it comes with both regular and curvy sizing, raglan sleeves (short or ¾ length), and also offers a version which is perfect for colour blocking!

Linen is my favorite fabric to both sew with, and wear, and I have tried several different ones from Crafty Studio. As I had never used stretch linen before, I was quite excited to try it out! I was not disappointed, it is SO soft! It washes beautifully, and I find that it keeps its color very well. It is a dream to work with, cutting it out and sewing with it was a breeze.

I chose to make the ¾ sleeved version first since we’re heading into autumn here. I cut out a size 14 after my measurements (bust 100cm/40”), but it turned out huge! It’s still a lovely top which I will get a lot of wear out of, as it is perfect for layering with a long sleeved wool top underneath.

 I have since made another short-sleeved version in the Mint Linen in AnnMarie’s shop, and sized down to a 12. It fits me better, but I might size down again to a 10 next time.

Loving the French seams! I must have done something wrong when I attached the neckband though, as it became a bit wobbly on the black version. But I’m ok with that. It isn’t super visible, and I wobble sometimes too 😉 

This fabric is perfect for so many different garments, but because it has such a wonderful stretch to it, I want to make a pair of trousers next. I’ve been drooling over the bright red colour “Crimson” and want to make a pair of Persephone pants from Anna Allen Clothing or the Lander pants from True Bias. Or maybe another Clyde work pants from Elizabeth Suzann? Or a Zadie jumpsuit?? The choices are endless!

Sewing is wonderful, isn’t it?

Ginnie xo

Fabric Swap 2020

This September saw lots of social media campaigns highlighting sustainability in the sewing community. There have been some really inspiring posts highlighting the need to be sustainable in our sewing practices, and practical steps people are taking. While we may strive to be 100% sustainable, this is not always possible and every little bit we do will add up. The main thing I took from the sustainable sewing posts in September was that the most sustainable fabric is the one you already own. Not a new fabric which may be made in an eco-conscious way but one you already have and that already existed. Hang on I hear you say! Don’t you own a fabric shop. Yes, I do! But I do think it’s important for everyone, not just sewers, to be sustainable in their practices.

This brings me to swapping fabric. I recently had a sewing meet up, at a social distance, with a sewing friend. She mentioned a fabric that a friend gave her but it wasn’t her style. I loved it, a turquoise jersey stripe. I offered her some of my wool silk I had squirrelled away as a swap. Just like that two people got fabric they loved without new fabric being bought or produced. This is where the seed set, and fabric swap 2020 was born.

After quite a few chats with Gillian, the amazing person behind @worthydesignstudio, we decided to host an online fabric swap. We all have fabric that we bought with great intentions but now they aren’t quite right. Maybe that event has passed, your style has changed, or like me they were for baby clothes but they are no longer babies!! This is an opportunity for us all to reorganise out stash, cull what we wont use and pass it on to a fellow sewer.

How It Works.

1- 4 October Let everyone know you are taking part in #fabricswap2020

5- 18 October Post pictures of your fabric you wish to swap. Include the following

  • Length and width of fabric
  • Fibre Content (if unknown, state ‘unknown’ but describe its content as best you can)
  • The country you are in.
  • State where you are willing to post* or which drop off* point you would like to use. i.e Ireland Only, UK only, or a participating local fabric shop (please check with your local shop in advance).
  • When someone had commented on your post and you have agreed a swap, please edit your post to say it is swapped.

19 Oct – 18 Nov Make something with your new fabric! Post it on Instagram with #fabricswap2020 and tag me @craftystudio.ie & @worthydesignstudio

At the end of November all sewers who used their fabrics will go into a draw for prizes donated by our sponsors. Remember to tag me @craftystudio & @worthydesignstudio in your makes so you are in the draw.

*Arrangements for posting/drop off and any incurring costs are between swapees, and not associated with any of our sponsors.

Linen Look Viscose Blouse by Geraldine Gorman

Ann Marie contacted me and asked me if I would make an item of clothing and write a blog using her 100% viscose in a solid colour. We discussed at length what pattern would show off this beautiful fabric. I eventually decided on my old favourite, Butterick B6378. I must say I was a little apprehensive as up until now I have used patterned fabric and have avoided plains, probably for fear of it showing up mistakes in my sewing! I decided that this was the time to bite the bullet and I looked forward to receiving my gifted fabric from Ann Marie.

This fabric is 100% viscose and has a lovely linen look texture with a beautiful drape. It was easy to work with, although ravelled a lot at the edges. I had considered doing french seams but then got lazy and tried out overlocking them instead. When pressed I was very happy with this finish. 

I made my usual size 12 with no alterations apart from shortening the blouse by a couple of inches. As I was making up the blouse I remembered a photo I had pinned on Pinterest with a similar white top and linen trousers. I set about looking for a trouser pattern and fabric to replicate the look and came up with the Style arc Tully trousers and Irish Linen and Tensel fabric also from Craftystudio. I am delighted with the finished look. 

The blouse feels beautiful to wear against the skin. Perfect for warm summer days. It’s so good to have some me made neutrals in my wardrobe. I will definitely be making more. 

Thank you for reading my blog. Hope you find it helpful. Geraldine Find me on instagram @backtosew20 

The fabrics used for geraldines blouse can be found here, and is available in white, beige, ochre, grey and black. There is a video on my IGTV @craftystudio.ie showing the drape and fall of the fabric. The Irish Linen Tencel blend can be found here. This fabric was made in Ireland and is a blend of Linen and Tencel.

Pippi Pinafore by Gemma Daly

Hi everyone, my name’s Gemma (also known as @thedalythread on Instagram), and I’m delighted to be a guest blogger with The Crafty Studio. When Ann Marie put a call out for guest bloggers, I thought I would put myself forward and I was so pleased when she chose me to do blog for her. Ann Marie was quite keen for me to try out one of her needle cords, which I agreed to do, and I chose the khaki colour. 

I had the Pippi pinafore pattern by Jennifer Lauren Handmade on my radar, as I’d wanted to make this for a while, so I suggested that this would be a perfect match for the needle cord. The pattern requires a lining fabric for the bib and pockets so Ann Marie very kindly sent me half a metre of the “Japanese floral on khaki” cotton lawn, which you can still find on her website. The cotton lawn is lovely quality, very light weight and super pretty.

The Pippi pinafore is a confident beginner pattern and can be made in a variety of woven fabrics, from denim, to needle cord and quilting cotton to wool. It’s a versatile pattern that has a more fitted waistband compared to any pinafores I’ve made before, and I think that’s what makes it so flattering. 

I made a wearable toile first of all out of denim, and although I will definitely wear it, I had a bit of a nightmare with all of the topstitching! If your topstitching isn’t going to plan, a few things to check/alter are – make sure you’re using a new sharp needle (as blunt ones can cause skipped stitches), depending on if it’s the spool or bobbin thread causing the problem, you could look at altering the thread tension, and also consider lengthening your stitches. 

I decided to omit some of the topstitching on my second version of the pinafore, made in the lovely needle cord, as I had such heartache with it the first time around. I don’t think it has taken away anything from it at all and I’m really pleased with my finished garment. Where the pattern instructs you to topstitch on the waistband, instead I folded it over and “stitched in the ditch” so that there was no visible stitching


I also cut off 5cm from the length of the pinafore as I just felt it didn’t sit right on me at the suggested length. I’m 5’6” and it came just below the knee. I prefer it to sit above the knee so that I can wear leggings with it. 

There are a variety of fastenings that you can use to attach the straps to the bib – on my first version I used buttons, but on this version I used some dungaree buckles that Ann Marie kindly provided. I had never used this particular type of buckle before (The Hemline Bib and Brace set in bronze), but I think they look great. You have to actually hammer them on, so I would advise to make sure they are lined up well and hammer on the reverse side. Just don’t do it TOO hard! I was also provided with some vintage sunflower brass buttons which match perfectly!

So on to the fabric….the needle cord was a pleasure to work with, it’s really soft and I had no issues guiding it through my machine. It comes in a variety of colours, so check out the Crafty Studio website and have a look. The only downside to using any kind of corduroy in any form, is that it sheds, so you end up with little bits all over you whilst sewing! I think you could over look that though as it’s such a nice quality fabric.
One other thing to mention is that this fabric does mark quite easily, so it may be worth thinking about what sort of clips/pins you use when sewing and don’t use a very hot iron on it. 

All of the items I’ve mentioned are currently in stock on the Crafty Studio website so please do go and check them out if you like what you’ve heard! Thanks again to Ann Marie for inviting me to do this blog post, it’s been a really enjoyable project. 

Take care everyone and happy sewing,

Gemma 

Cotton Lawn Top by Geraldine Gorman

I was delighted when I spotted a call for a sewcial sew along by Ann Marie in Crafty Studio  on Instagram. This was exactly what I had been looking for, as I had returned to sewing after a 20 year break and was looking to join a sewing class closer to home. I wanted to update my sewing skills and more importantly to make contact with others in the sewing community. 

Of course the Covid19 lockdown had put an abrupt stop to attending any classes in the traditional way so this certainly was an appealing option. I signed up straight away and the What’s App group was formed. 

We were to make the Angela Kane’s sleeveless top, which can be found on her website. This is a free pattern and Ann Marie explained that sleeves could be added from another pattern if we wished. The pattern was downloaded and printed and now for the exciting bit, picking the fabric! Ann Marie has a great selection of suitable fabrics on her online shop. I settled for a beautiful pima cotton lawn.  Unfortunately the one I choose is now sold out but there are loads more on the website that would also sew up beautifully.

Each week Ann Marie uploaded a couple of videos walking us through each step. How to take our measurements correctly, how to recognise fitting issues etc. I had made a woven top in the past but had not liked the fit on me and had no idea how to fix it. This was a wonderful opportunity to get expert guidance from the comfort of my own home. Ann Marie soon identified that I needed a narrow shoulder adjustment. This would take care of the extra fabric that seemed to gather at my shoulder in previous woven tops.  I also raised the bust apex by 1cm and lengthened the top by 6cm. I decided on a size 14. My measurements are bust 37″ waist 32″ hips 38″.  My height is 5′ ft 5″  

I loved the pace of this class. Some people were working and only sewed at the weekend but it didn’t really matter as the classes were there for you to watch when it suited! Prior to Covid19 I wouldn’t have considered doing an online sewing class but certainly I feel these classes have their place especially in rural communities where the nearest sewing class could be an hour or more drive away. 

Over the next 2 weeks Ann Marie uploaded classes and we followed along. I enjoyed the banter in the class and seeing everyone’s makes at different stages. I decided to add a flutter sleeve to my top. Again this was from a free pattern The Simply Sew Amelia Tea Dress. My cotton lawn had a lovely drape and the flutter sleeve worked well. I also learned how to do a rouleau loop to secure the back of the top. As my local haberdashery shop was closed due to Covid I decided to use covered buttons instead. I love the finished look.

Verdict: I am very happy with the finished top. I think the fit is so much better with the narrow shoulder adjustment. The cotton lawn was lovely to work with and pressed beautifully. I think next time I might try making a size 12 as the fit of the top is generous.

My daughter loved my finished top, so of course I offered to make her one. We went online and bought a beautiful Lady McElroy cotton from Ann Marie. This fabric had more structure and was a beautiful quality.  Once again I went back to Ann Marie’s videos to refresh my memory and the top sewed up with no hitches. I sewed a straight size 10 for my daughter with no adjustments. When she fitted it on she wasn’t sure about the flutter sleeve as this fabric didn’t have as much drape as my cotton lawn. I decided to add 4 small pleats at the bottom of the sleeve to take in the fullness. My daughter loved the end result!

Both mine and my daughters tops took 1m of fabric.  I will definitely be making more now that I have nailed the fit.

Geraldine  @backtosew20

You can find Geraldine on Instagram @backtosew20 

Sustainable Studio

More and more we hear of sustainability and being eco friendly or slow fashion. But what does this really mean? Reduce reuse recycle? Ending consumerism? Planting a tree? Yes possibly all of the above! Sustainability simply means , can we carrying on the way we are going, is what we are doing sustainable? If not, what can we do to change it?

So how are we sustainable in the crafty studio? Firstly let me give you a little bit of background about myself and why this topic means so much to me. I grew up in a household of make do and mend. Not just out of necessity but out of the accomplishment of fixing or making something yourself. This has always stuck with me. The four years I spent in NCAD added to this, designing and creating my own artwork on very little budget. Recycling clay was a big thing!

Broadmeadow Community Garden Open Day

Then when I started teaching it was all about educating the future eco warriors! I became a green schools officer and did this for eight years. We were awarded four green flags in that time and some of my students went on to creating the first green colleges. I also have a passion for sustainable agriculture and community.

Fintan and I planting herbacious perenials outside the community garden.

In 2010 I set up the first community garden on open public land. Broadmeadow community garden is still a thriving community enterprise bringing people together young and old and learning how to sustain themselves both through food and community.

Sew Over It Pussy bow Blouse made with Floral Sketch on Ochre – ex designer deadstock fabric.

How is all this translated to a fabric shop? Surely buying more fabric, producing more is not the way forward. Well yes and no! I aim to provide fashionable dressfabrics that are sustainable by buying as much deadstock fabric as possible . Deadstocks are rolls of fabric that are left after a garment production run, fabric that was dyed the wrong colour, or surplus fabric that is unsold by the textile mills and left in storage. I also stock a large amount of Okeo Tex 100, Tencel and Organic fabrics. Oeko-Tex textiles and fabrics are certified free of harmful chemicals and are safe for human use. Tencel is a fabric regenerated from wood cellulose. It is similar in hand to rayon and bamboo, both of which are regenerated fabrics. However, Tencel is one of the most environmentally friendly regenerated fabrics, for several reasons. Tencel fibers are grown sustainably and manufactured with very little chemicals..

After Puci – ex designer deadstock fabric

Organic certification means that textile and fabric products are grown according to strict guidelines on the use of petroleum based fertilisers, pesticides and synthetic products.

Selection of rPET thread.

When choosing haberdashery and thread I wanted to stock either biodegrable or recycled options. As a result I discovered Guttermanns rPet threads. These have all the benefits of sew all polyester but are made from 100% recyled PET bottles. For every 1000m of thread 1 plastic drinks bottle is recycled. I also chose to stock 100% cotton thread for those who prefer a completely biodegradable option.

Even with all this careful planning to the sourcing of my stock I was not prepared for the amount of packaging and waste that would come with their delivery! Some careful thinking was needed here! Below are some of the ideas I came up with tho help keep the single use plastic and waste to a minimum.

Plastic packaging all sorted ready to be give a second life!
  • Request fabric loose rather than on a roll, then roll onto recycled card when it arrives at the studio.
  • Save plastic packaging to be reused on larger orders.
  • Wrap fabric in pattern paper rather than tissue. Bonus for customer and cuts out single use packaging.
  • Offer rotary blade and thread spool recycling recycling. Im still working on the thread spool recycling but you can send your rotary blades to me and I will recycle them.
  • Use of card boxes or biodegradable postal packaging.

  • Switch to paper tape and sticker. (once current supply runs out)
  • switch to sustainably sourced energy for heating the studio.
  • Paperless receipts.
  • Compost all unwanted card (bonus to my veg plot!)
  • Making scrap bags to sell.
  • Paperless gift cards

Thats all Ive done in the studio so far and it may seem like a lot but its a way of living for me and always has been. I hope to continue on with my sustainable ethos, adding to it as my business grows.

Pop Up Shop – Red Stables

On Friday we decided to do our 1st pop up shop. It was held in the cottage market, Red Stables, St Annes Park Clontarf. What a beautiful venue for a for a market. The Red Stables as its is now called was the stables for Lord Ardilaun in St Annes Estate. The Cottage Market, is held inside the actual stable room where some of the original horse stalls are intact.

The Cottage Market, is held inside the actual stable room where some of the original horse stalls are intact.

St Annes Park is very dear to my heart. I grew up in the area, playing in the fields and around the follies as a child. As a Mammy I bring my children here to the park and playgound and to Olives for an Iceream treat!

The Red Stables has become the focal point for many locals. Grabbing a coffee or treat after their morning stroll, visiting an art exhibition,(which I’ve had several here) or popping into one of its markets.

Although this Friday was a bit of a miserable day weather-wise there was a constant trickle of people visiting the market. I was armed with hand sewing, magazines and a sketchbook, ready for a quiet day! Not so my legs ached by the end of the day.

Although this Friday was a bit of a miserable day weather-wise there was a constant trickle of people visiting the market. I was armed with hand sewing, magazines and a sketchbook, ready for a quiet day! Not so my legs ached by the end of the day. But it was worth it to meet so many wonderful visitors and crafters and some canine companions too!

“Great selection and expert advice. Picked up a few bits myself today.🙂👍” – Claire Mc Loughlin

Fabric Sold Per 1/2 metre
Fat quarters and Bundles

It was a very successful day overall and we will be back on Saturday 7th September for our next pop up shop. As before, if you have any request for particular fabric or haberdashery, just pop me an email (annmarie@craftystudio.ie) or dm via instagram or facebook and ill make sure to bring it along! See you at the next one.

New Years Resolution

Pheonix Park Walled Garden
Finished pieced quilt top, ready for quilting.

New yrs resolution done! A piece in an exhibition. Sorry a bit late blogging about it!!The exhibition was run by the Eastern Branch of the Irish Patchwork Society. Held in Phoenix park visitor centre next to the walled garden. As soon as I heard the theme and location images of the beautiful walled garden came to mind. My husband and I often visit this garden during at all times of the year. Creating artwork and Gardening are my two passions. I love planting seeds, watching them grow and then getting to eat your produce! Yum!  I imagined the different vegetables that I would grow in each season. One for every season in raised beds surrounded by terracotta roped borders. 

Me and my entry.

I had never done foundation paper piecing before and when looked for a pattern I couldn’t find anything I liked. So I had to design my own, I don’t like the east life do I ? The fabric was a selection of stash fabric, fat quarters bought from green acre quilt shop and scraps left at the IPS Eastern Branch meeting. The 1st few designs did not go to plan. Spring onions looked more like cabbages and tomatoes like strawberries! But after a few attempts I got the hang of it!

Cart
  • No products in the cart.